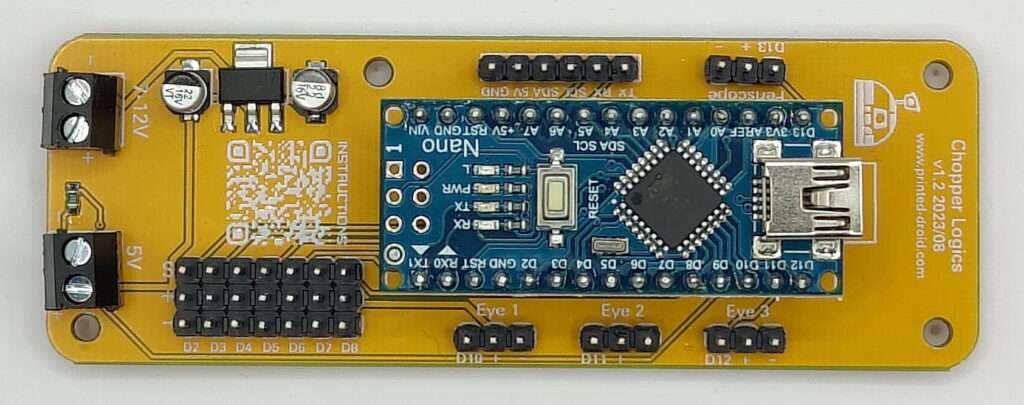
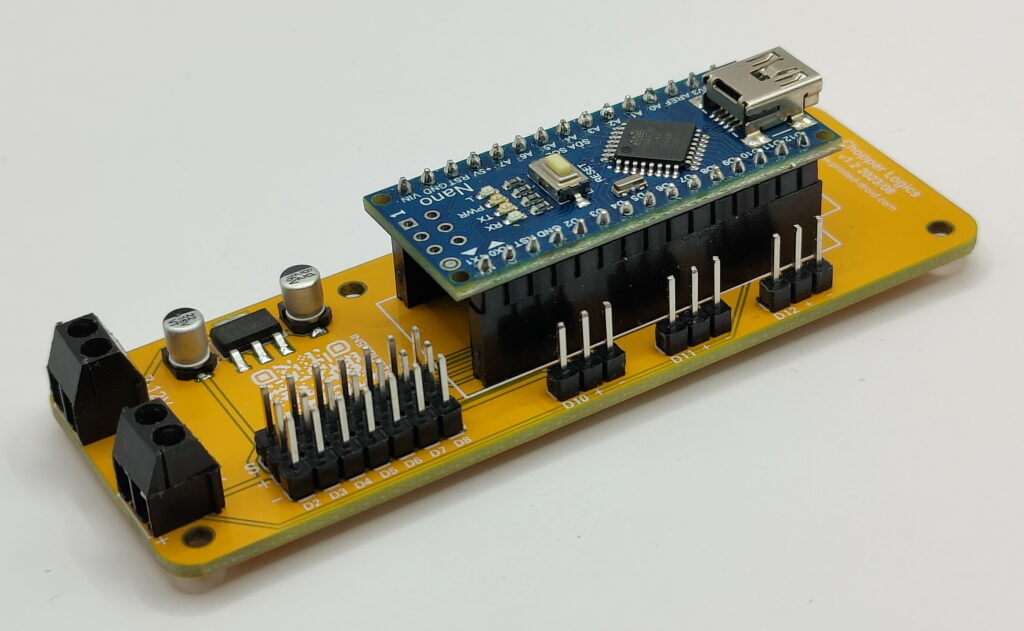
The Chopper Logic Light Board is powered by an Arduino Nano.
The circuit board has the dimensions 90x32mm
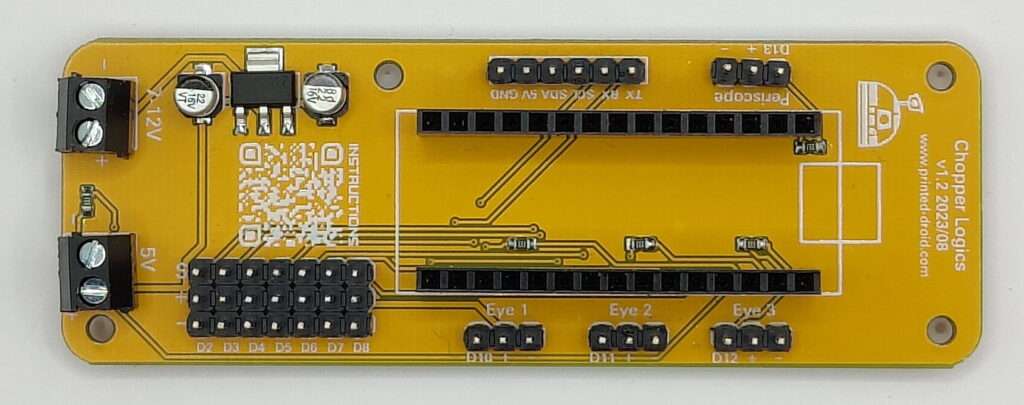
The power supply is possible via 5V or 7-12V (please use the correct input terminal).
Pinout:
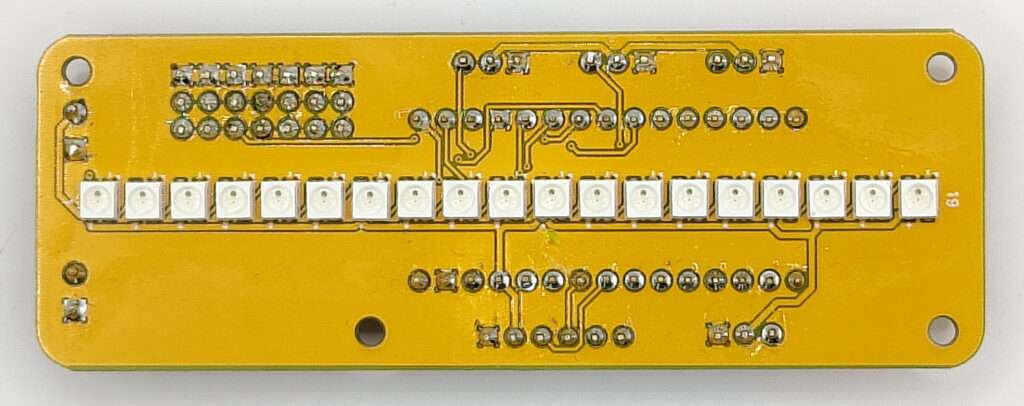
Ladder Light – D9 (19 Leds)
Eye 1 – D10
Eye 2 – D11
Eye 3 – D12
Periscope-D13
D2-D8 are also available for individual use.
The attached sketch only operates the Ladder Light. Everything else must/can be customized.

Available at shop.printed-droid.com